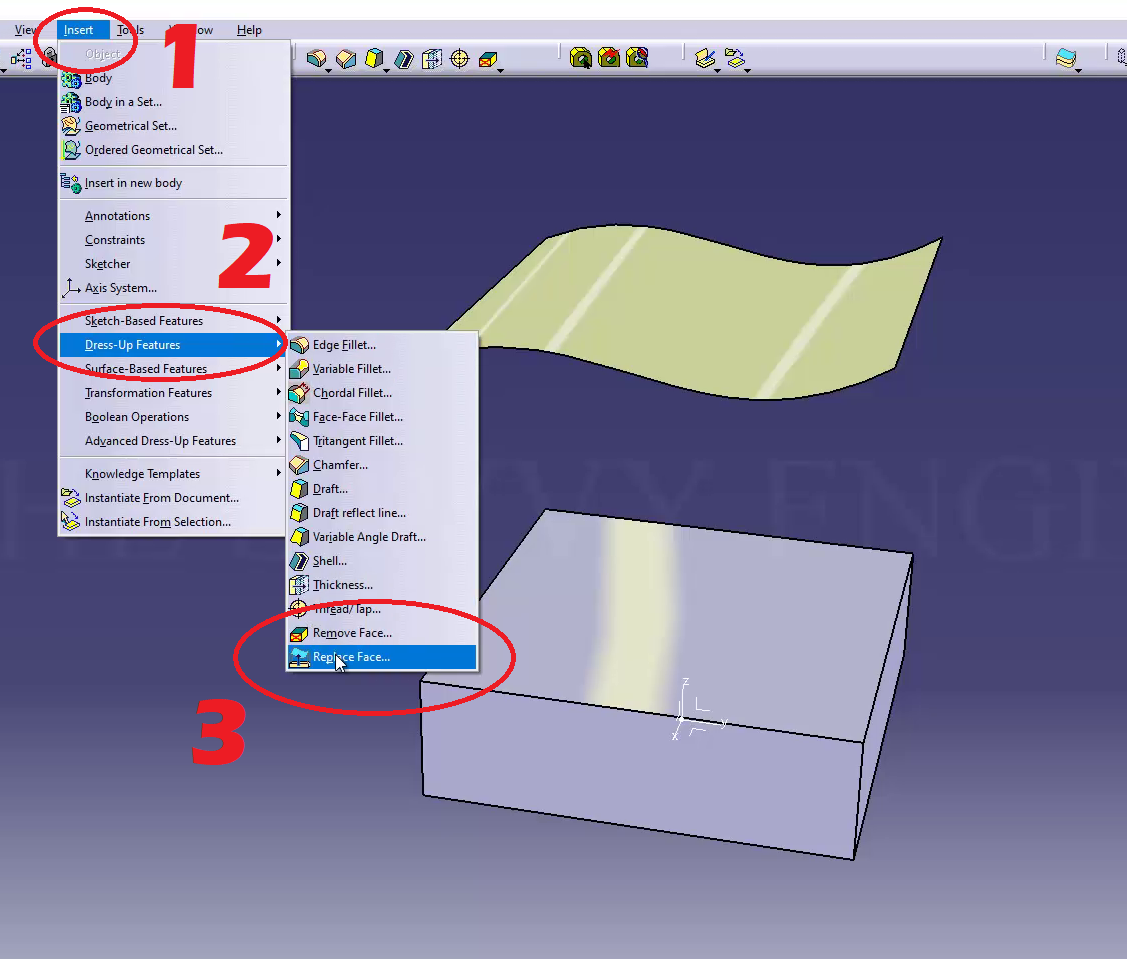
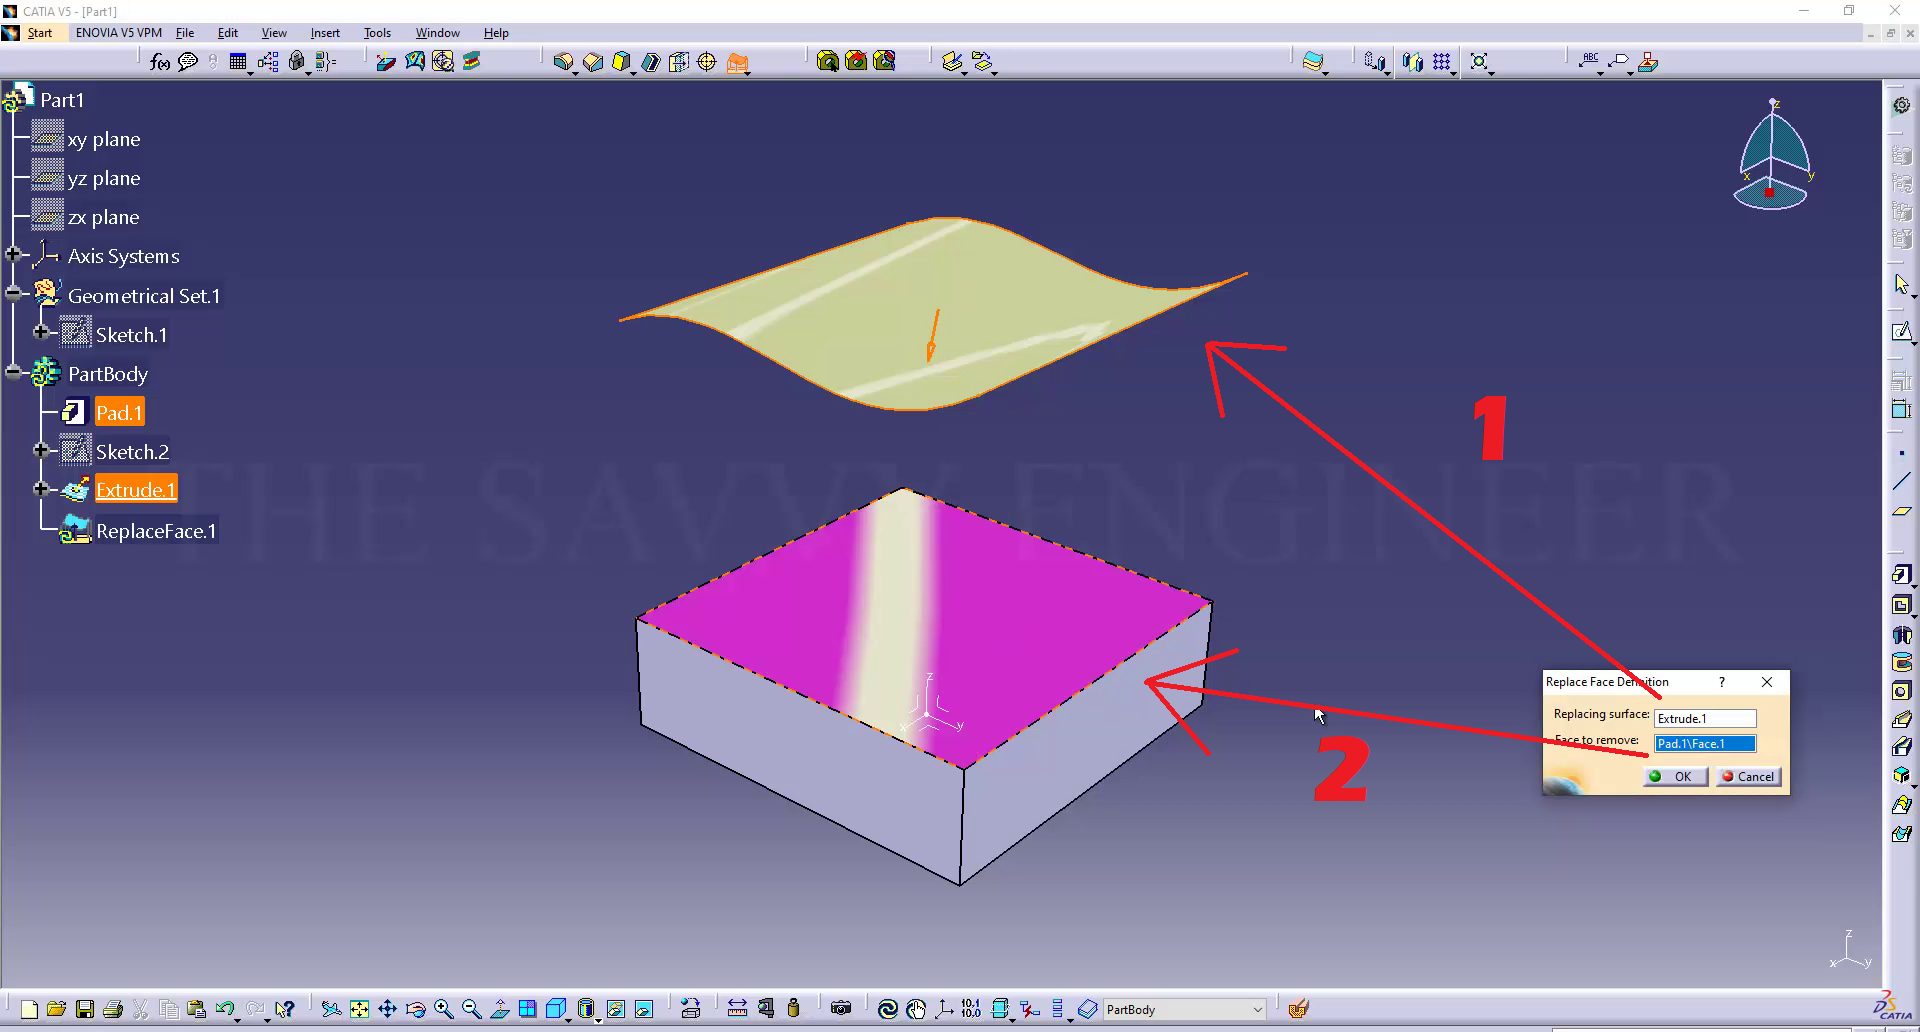
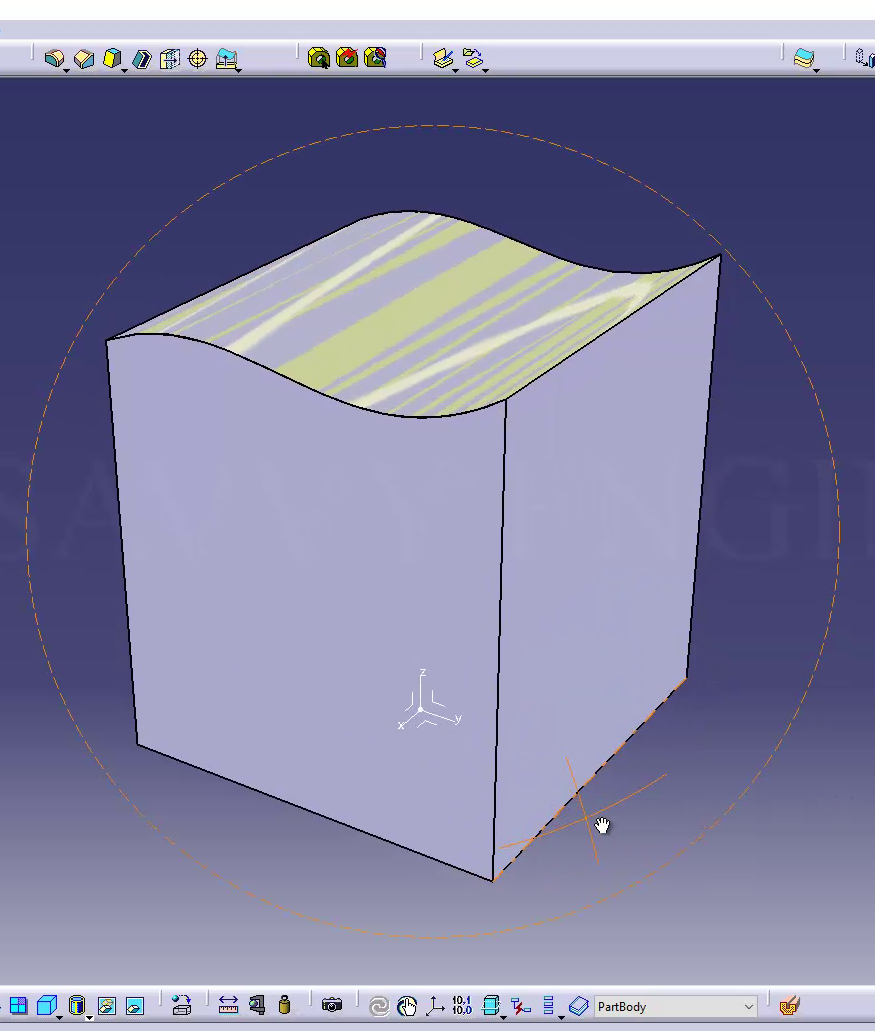
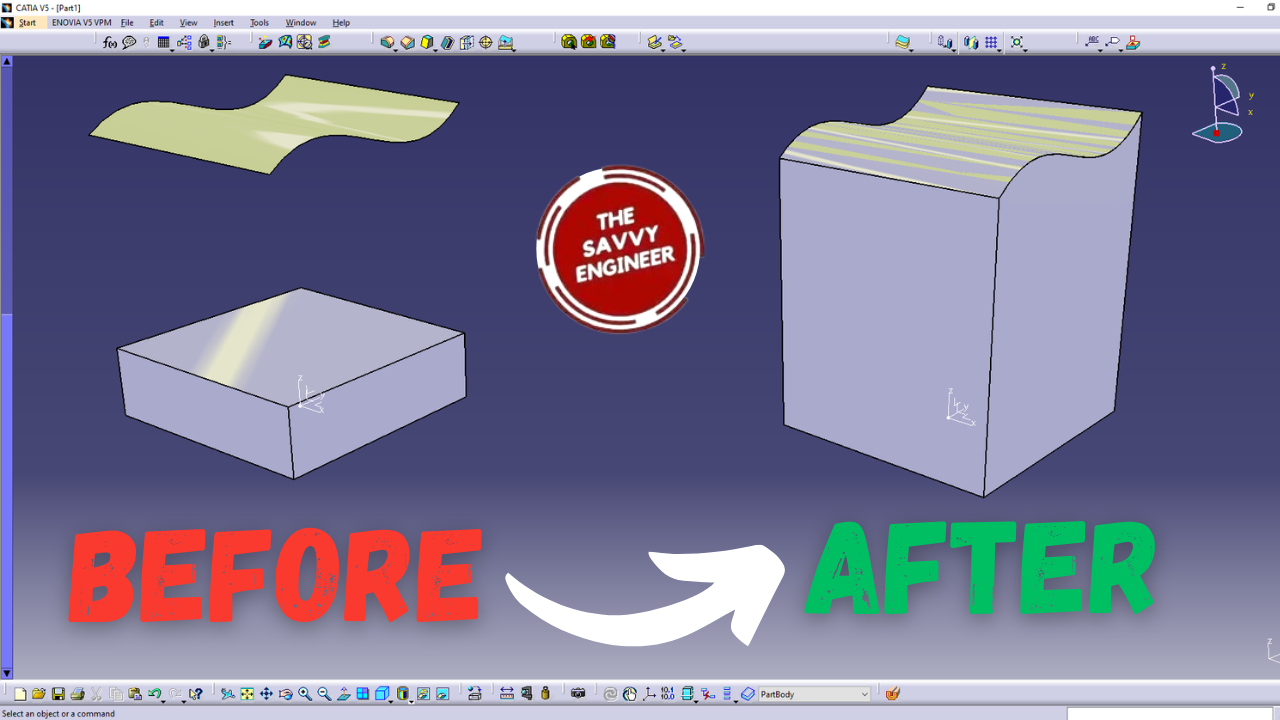

Learning how to extrude a part face up to a surface in CATIA is important for creating precise and flexible 3D models. This feature allows you to extend a solid or feature until it meets another surface, ensuring perfect alignment with complex shapes. It eliminates guesswork and helps maintain accurate dimensions across connected parts.
When the reference surface changes, the extrusion updates automatically, improving design efficiency. Mastering this technique strengthens your ability to handle advanced modeling tasks, especially in mechanical, automotive, or aerospace projects, where precision and adaptability are key to producing high-quality, professional designs.
First, Click Start, Mechanical Design, then Part Design Workbench.
Second, check the ‘Enable hybrid design‘ and the ‘Create a Geometrical set‘ Options. Then Click OK.
Go to the (XY) Plane, then Click on Sketch.
Go to the Rectangle Command, then you will find the centered rectangle option, click on it.
Now, click on Constraint, then add 100mm to the length and 100mm to the width. Click on OK, then exit the Sketcher Workbench.
Now, Click on the Pad Command. You will get the following warning message, ‘the current in Work object isn’t in a Body. the new solid feature is created after the last feature of the Partbody.‘ This means, if you will create a solid part, for instance an extrusion, it will be saved under the Partbody, and the sketch, for instance the centered rectangle will be saved under the geometrical set. Next, Click on OK.
In the Length field, Add 30mm then click on OK.
Select the (YZ) Plane, then Click Sketch.
Go to the Spline Command, then draw a new spline like this, see image below.
Go to Constraint, Hold the Ctrl button, select the point of the spline, then the edge of the extrusion. do right-click then click on coincidence.
Repeat the last step with the other extremity of the spline.
If you get a point like this, see image below, you can move it a little bit to the right.
The Spline should look like this. Then exit the sketcher workbench.
Now, go to Start, Shape then Generative Shape Design workbench.
Select the spline, Go to the extrude command, add 50mm to the first limit and 50mm to the second limit. Then Click on OK.
You should get a result like this before we pass to the replace face command.
Come back to the Part design Workbench.
Go to Insert, Dress-up features then replace face.
Select the replacing face field, then click on the surface. Next, select the face to remove field, click on the top face of the extrusion, then click on OK.
The final result should look like this, see image below.
Good Job! You did it!
You cannot copy content of this page