Mastering CATIA: How to Extrude a Part Face Up to an External Surface for Precise 3D Modeling
Creating complex shapes in CATIA can seem tricky at first, but with the right steps, you can easily extrude a part’s face up to an external surface. This technique is vital for detailed modeling and helps ensure your designs fit perfectly. Whether you’re designing mechanical parts or intricate components, mastering this process saves time and boosts accuracy. Let’s walk through how to do it step-by-step.
Understanding the Basics of CATIA’s Part Design Environment
What is CATIA and Its Role in 3D CAD Modeling
CATIA is a powerful tool for designing mechanical parts and shapes. It offers a wide range of features to create, modify, and refine 3D models. You can build simple objects or complex assemblies, making it ideal for engineers and designers.
Navigating the Interface
CATIA has different workbenches for various tasks. The Part Design and Generative Shape Design workbenches are key for creating shapes and surfaces. The interface includes easy-to-access toolbars, where commands like extrusion and surface editing are located.
Setting Up Your Workspace for Accuracy
Before starting your design, enable the appropriate options for your work. Select the correct planes, like XY or YZ, to sketch on. This setup helps ensure your dimensions and shapes are precise from the beginning.
Creating the Initial Geometry for Extrusion
Sketching on XY and YZ Planes
Begin by drawing simple shapes like rectangles on the XY plane. For example, draw a 100 mm square to serve as your base. Move to the YZ plane for more complex curves, such as splines, to shape your surface.
Applying Constraints for Precision
Lock points and edges in place by applying constraints. For example, meeting a spline point coincident with an edge ensures your shape stays accurate. Move points slightly if needed to refine the surface.
Extruding the Base Shape
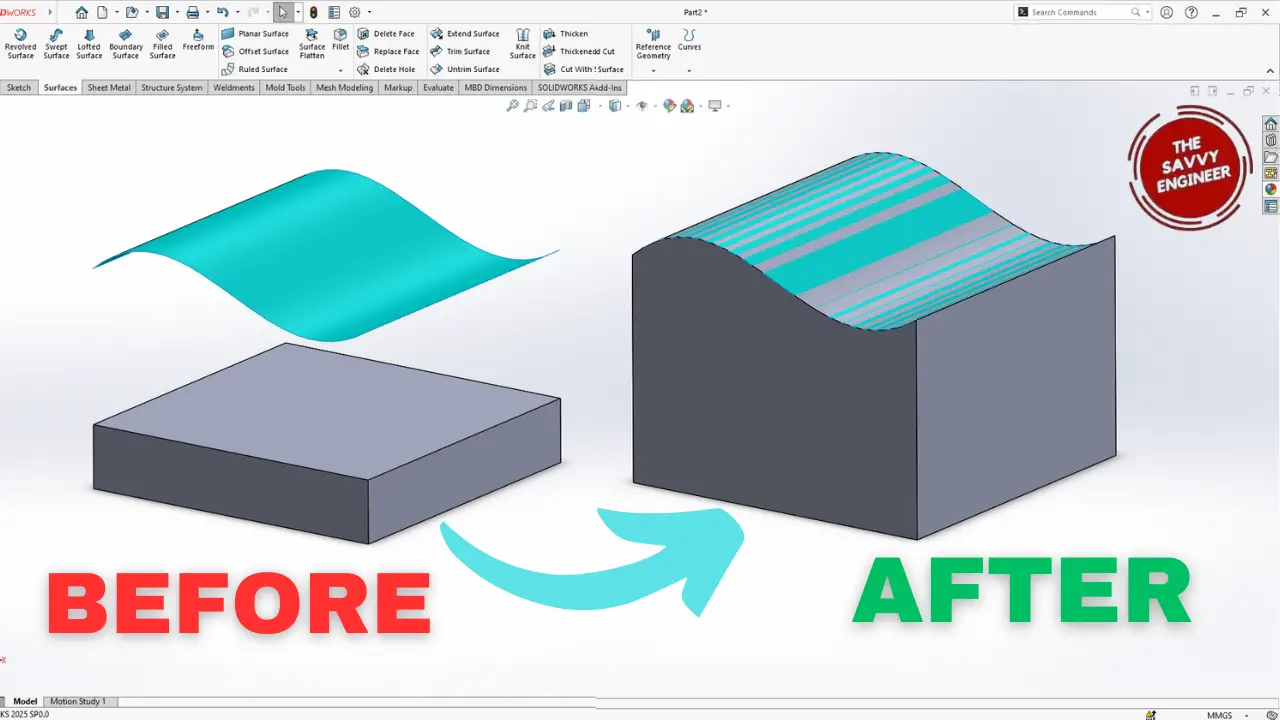
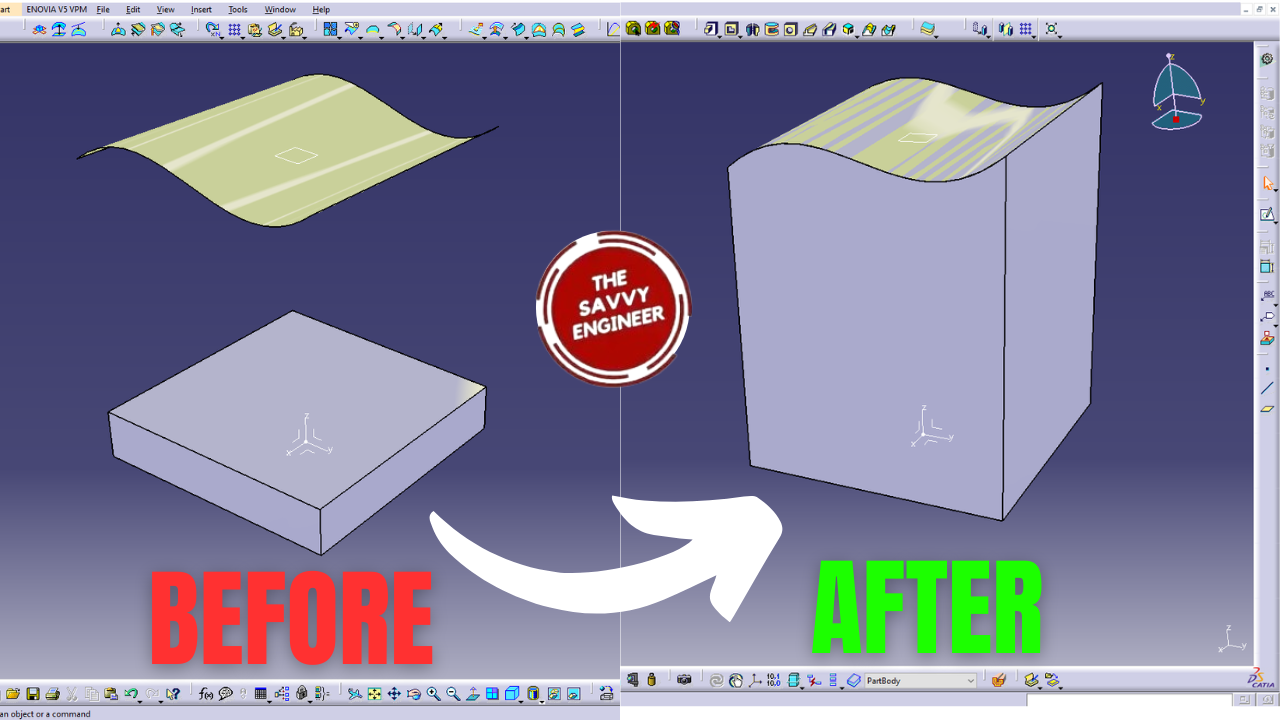
Switch back to the Part Design workbench and use the Pad feature. Enter a height (say, 20 mm) to create a solid block. This solid is your starting point for the complex extrusion.
Example Recap
- Draw a 100 mm x 100 mm rectangle on XY plane.
- Pad it to 20 mm height.
- Draw a spline on YZ plane to define the surface shape.
- Use extrude options in the Generative Shape Design to create the desired surface.
Using Generative Shape Design to Extrude Up to an External Surface
Switching from Part Design to Generative Shape Design
Once your base shape is ready, move to the Generative Shape Design workbench. Here, you can generate complex surfaces and perform advanced extrusions.
Drawing the Surface to Extrude Up To
Create a spline or other curve on the YZ plane to define the external surface. Use constraints to make sure it follows your design intent. This curve will act as the boundary for your extrusion.
Extruding Up to an External Element
Select the Extrude command in Generative Shape Design. Choose your sketch as the profile. For the limit, select Up to Element, then click on the reference surface or point. This ensures the extrusion stops exactly at your external surface.
Tips to Avoid Common Mistakes
- Double-check your selections before confirming.
- Make sure the reference points and surfaces are properly constrained.
- Validate the surface boundary to avoid errors later.
Replacing and Removing Faces for Final Adjustments
Using the Replace Face Command
In the Part Design workbench, use Insert > Dress Up Features > Replace Face. Select the surface you want to replace, then pick the new external surface. This helps align the part with the external shape accurately.
Finishing Touches
Hide the sketches to view the final part clearly. Inspect by rotating or zooming to ensure the extrusion matches your design goals. Clean up any unnecessary faces or edges for a neat finish.
Advanced Tips and Best Practices for Extrusion in CATIA
- Use keyboard shortcuts to speed up your workflow.
- Save templates for repetitive designs to save time.
- Always verify your surface and face selections carefully to prevent errors.
- Manage constraints to keep your sketches flexible yet controlled.
Conclusion
Mastering how to extrude a part face up to an external surface in CATIA is key for creating precise models. By following these steps, you can achieve accurate results with minimal hassle. Practice frequently, and soon this technique will become a routine part of your CAD toolkit. For even more advanced features, explore CATIA ’s tutorials and community resources. Keep shaping your ideas into reality!