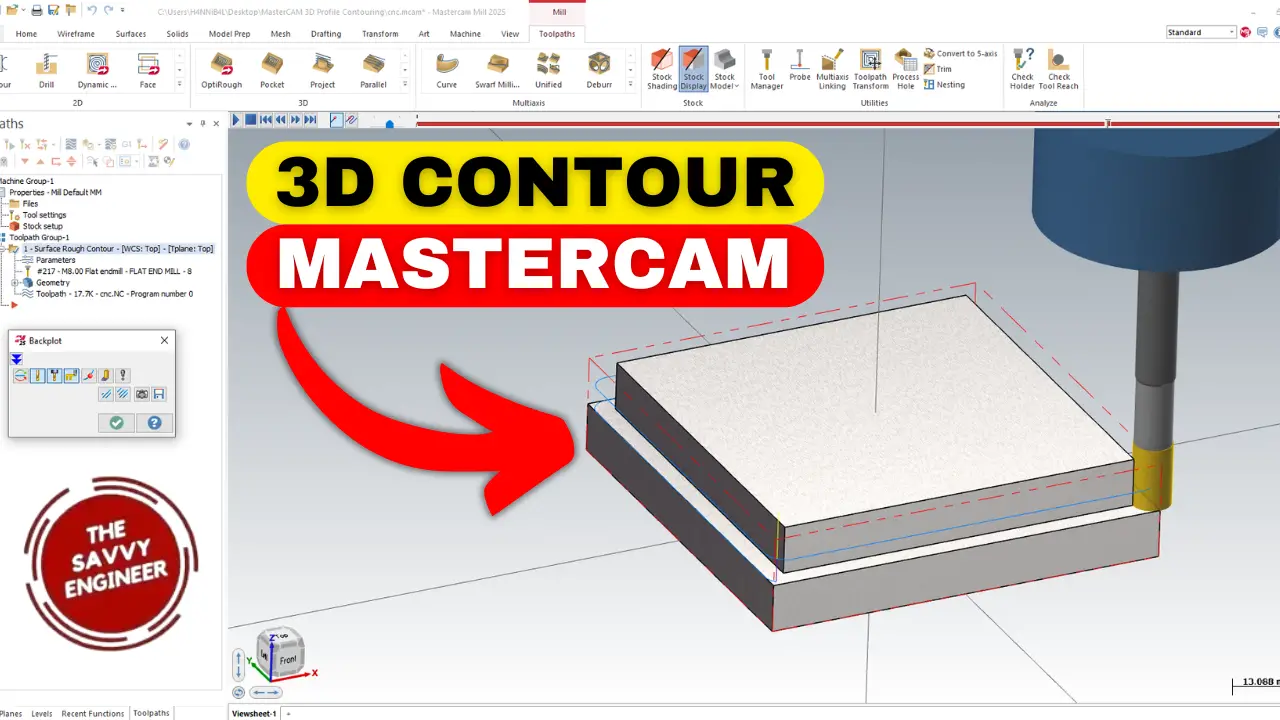
How to Create 3D Profile Contouring in Mastercam: A Step-by-Step Guide
Creating smooth, precise 3D curves on your materials is essential in CNC machining. Mastercam makes this process easier than you think, even for beginners. Learning to contour a 3D profile ensures your parts look professional and function flawlessly. This guide walks you through each step of creating a 3D profile contour in Mastercam, so you can get started quickly and confidently.
Understanding 3D Profile Contouring in Mastercam
What Is 3D Profile Contouring?
3D profile contouring involves cutting along precise lines on complex surfaces. It helps shape parts with detailed curves, like automotive bodies or artistic sculptures. This process is vital when you need smooth, flowing surfaces that standard milling can’t achieve.
Key Components of the Process
To get this right, you need to set up your workpiece, choose the right tools, and adjust parameters carefully. Mastercam offers various options, but sticking to a simple setup helps beginners learn faster.
Setting Up Your CNC Machining Project in Mastercam
Choosing the Machine and Mill Configuration
Start by selecting the correct machine setup. Navigate to the machine menu, then click mill, and pick default. This ensures your toolpaths match your actual CNC machine.
Defining the Material Stock
Next, define your stock material. Click stock setup and choose create rectangular stock. Select your part body, then hit end selection. Confirm with OK and display your stock. You should see red lines outlining your raw material, making it clear what you’ll machine.
Configuring the Workpiece
Focus on the specific part you want to cut. Select the part’s body, then choose the face you want to contour. This helps Mastercam know where to focus your toolpaths for the best results.
Creating and Configuring Toolpaths
Starting the Surface Route and Contour Path
Go to the toolpath menu, then click surface route, followed by contour. This opens the contouring setup where you can customize your cut lines.
Selecting and Filtering Your Tools
Pick your tool by clicking the tool filter. For a smooth finish, select an 8mm flat end mill. You can filter tools by size or type to find the best match. Once chosen, click OK to confirm.
Setting Surface Parameters
Set your surface parameters to absolute. This makes sure your depths are clear and consistent. For step-downs (the depth of each cut), add around 5mm. This helps your tool cut smoothly without forcing it.
Defining Cutting Directions and Depths
Choose one way for the cut direction instead of zigzag. One-way cuts tend to last longer and leave a better finish. Next, set your total cut depth — for instance, 10mm divided into two passes of 5mm each. This reduces the stress on your tool and makes your job safer.
Fine-Tuning the Contour Path for Best Results
Adjusting Step-Down and Stepover
Balance your step-downs and stepover. Smaller steps improve surface finish but take longer. Larger ones speed up work but can roughen the surface. Find the right mix based on your project needs.
Customizing Path and Strategy
Switch between zigzag and one-way cutting based on the shape. Use one-way cuts for smoother surfaces, zigzag if you need faster material removal. Preview your toolpath to catch errors early.
Finalizing and Verifying
Always check your toolpath before running the machine. Use Mastercam’s visualization tools to see how your cutter moves. Fix any strange paths to avoid surprises during machining.
Practical Tips for Better 3D Contour Machining
Improve Efficiency and Accuracy
Set your stock limits tightly to avoid unnecessary cutting. Use Z-levels effectively, choosing the right height steps to match your project complexity. This saves time and makes finishing easier.
Stay Safe and Prepare for Post-Processing
Always double-check your G-code output before sending it to your CNC. Proper safety and setup procedures prevent accidents and machine damage. Keep tools sharp and clean for perfect finishes.
Conclusion
Making 3D profile contours in Mastercam is straightforward once you understand each step. Start with proper setup, select the right tools, and fine-tune your parameters. Experiment with different depths and paths to find what works best for your parts. Keep practicing, and you’ll soon master complex surfaces easily.
Ready to take your CNC skills further? Keep exploring new techniques, and don’t forget to subscribe for more tutorials. Happy machining!