How to Create a 2D Pocketing Machining Operation in MasterCam: A Step-by-Step Guide
Creating a 2D pocket in MasterCam is a vital skill for CNC programmers. It helps remove material efficiently and achieve a smooth finish on various parts. Mastering this process allows you to produce precise pockets that meet exact specifications. This guide walks you through each step, making the process clear and easy to follow.
Understanding 2D Pocketing Machining in MasterCam
What is 2D Pocketing?
2D pocketing involves cutting out hollow areas within a part’s outline. It is commonly used to make recessed features or holes. Knowing how to program pockets helps you create complex parts faster and more accurately.
Features and Benefits
Using 2D pocketing reduces machining time. It also improves surface quality and saves tool wear. This method is essential for parts like molds, enclosures, or fixtures that need internal cavities.
Common Applications
Many industries rely on pocketing to make precise cavities. Think of mold making, electronics housings, or metal fixtures. Pocketing simplifies these tasks and ensures uniform material removal.
Setting Up Your CAD Model and Stock in MasterCam
Preparing the CAD Model
Start with a clean, accurate 3D design or 2D drawing of your part. Confirm the dimensions match your specifications. Proper orientation minimizes errors during machining.
Creating the Stock Material
Navigate to Machine > Mill > Default. Here, you’ll define your raw material size. Select Create Rectangular Stock, then pick your part’s outline to match its shape. Display the stock shape with the stock display feature to see the material ready for cutting.
Defining the Stock Setup
Choose the part’s boundary to set the stock limits. This step ensures the cutter only removes material within the defined area. Visualizing the stock helps prevent machining outside intended zones.
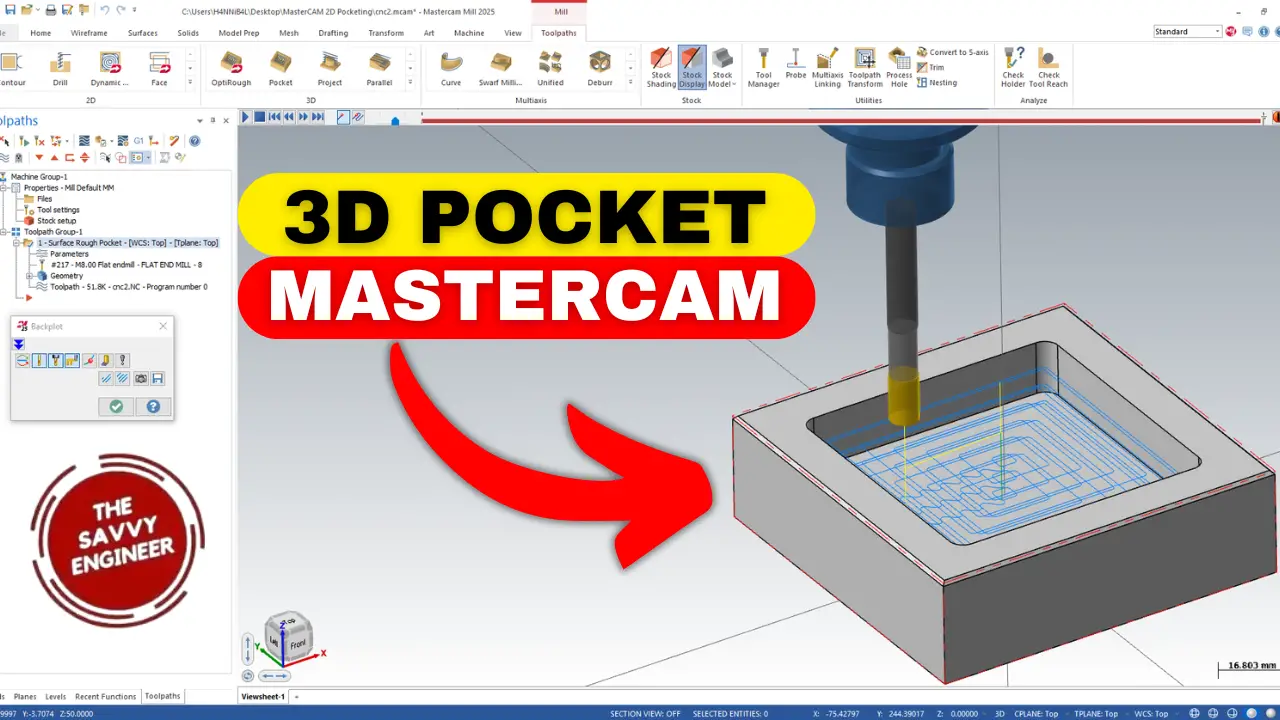
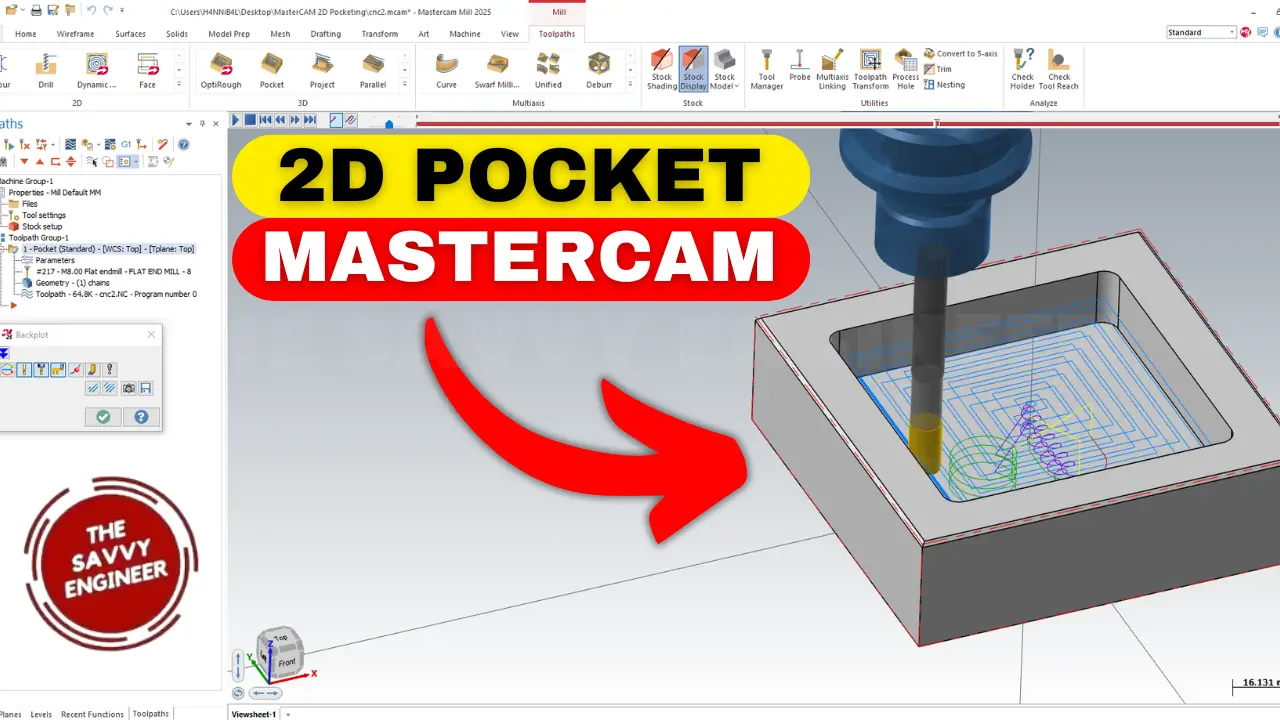
Creating the 2D Pocketing Toolpath in MasterCam
Initial Toolpath Setup
Right-click on the Tool Paths folder and select Pocket. Pick the contour or line that outlines where the pocket will be cut. Confirm your selection to proceed.
Selecting the Cutting Tool
Using Tool Filters
Filter tools by diameter to find the correct cutter. Set the filter to show None, then select Equal and enter 8mm. This ensures you pick the right size for the pocket.
Selecting the Proper Tool
From the library, choose an 8mm flat end mill. This provides a clean cut and is versatile for many materials. Confirm the tool and holder details before proceeding.
Configuring Tool Parameters
Set the tool diameter to 8mm. Confirm the tool holder matches your actual tool. These parameters ensure the CNC machine interprets the code correctly.
Defining Cutting Parameters
- Adjust Stock to Leave on Walls and Stock to Leave on Floors to zero. This means the cutter will remove all excess material.
- Set Pocket Depth to 15mm, which is the total thickness of the material to remove.
- Enable Depth Cuts, and set Finish Step to zero for a smooth surface finish.
- Change Maximum Rough Step to 5mm. This divides the cut into three levels, making the process smoother and reducing tool stress.
Linking and Motion Settings
Switch all incremental moves to absolute coordinates. Set Retract Height to 35mm for safe travel above the part. Define the Feed Rate based on material and tool specifications. Set the top point to the stock’s top and bottom to the pocket’s depth for proper Z-movement.
Simulating and Verifying Toolpath
Use MasterCam’s simulation feature to visualize the pocketing process. Confirm the tool moves smoothly, and the material is removed as planned. Fix any issues before actual machining.
Optimizing the Pocketing Operation for Efficiency and Quality
Best Practices for Tool Selection
Choose a cutter suited for the part material and pocket size. An 8mm end mill works well for most projects, but consider larger or smaller tools for different features.
Ensuring Accurate Depth and Finish
Use multiple passes for deep pockets. Setting a small Step-Over results in a better finish. Always check tool wear and adjust parameters as needed.
Troubleshooting Common Issues
If you notice tool chatter or uneven surfaces, reduce feed rates or increase the number of cutting passes. Confirm the cutter’s alignment and stability before continuing.
Post-processing and Code Verification
Always review your code before sending it to the CNC machine. Use post-processors compatible with your machine to generate correct G-code.
Practical Tips for Effective 2D Pocketing in MasterCam
Quick Tips for Beginners
Organize your layers and name your files clearly. Save templates for common pocketing tasks to save time. Practice on scrap material before working on final parts.
Expert Advice
Reduce machining time by choosing the right tool and optimal feed rates. Use multiple passes rather than trying to cut all at once. This extends tool life and improves surface quality.
Industry Insights
Efficient pocketing can cut production times by up to 30%, according to industry reports. It also results in better surface finishes, minimizing additional finishing steps.
Conclusion
Creating a 2D pocketing operation in MasterCam is straightforward when you follow the right steps. Clear setup, proper tool selection, and optimized parameters are key. Practice makes perfect, so keep experimenting with different geometries and settings. The more familiar you get, the cleaner and faster your machining becomes. Start today, and watch your CNC programming skills improve rapidly.